Showing posts with label Tiller. Show all posts

Sunday, August 24, 2014

Rudder Cheeks

Just thought I'd start this post with a side profile of the boat when I showed up today. I continued using some compound on the last part of the port side. On the starboard side of the hull, I wet sanded by hand with 600, 800 and 1500 grit sandpaper. Used a spray bottle of water to wet down the hull. I started doing compound on the starboard side but got about a third of the way through then decided to call it a day. Temps got into the mid 90s with heat index forecasted at 100-105F. I was drinking plenty of water but I didn't want to over work myself in this heat.
 
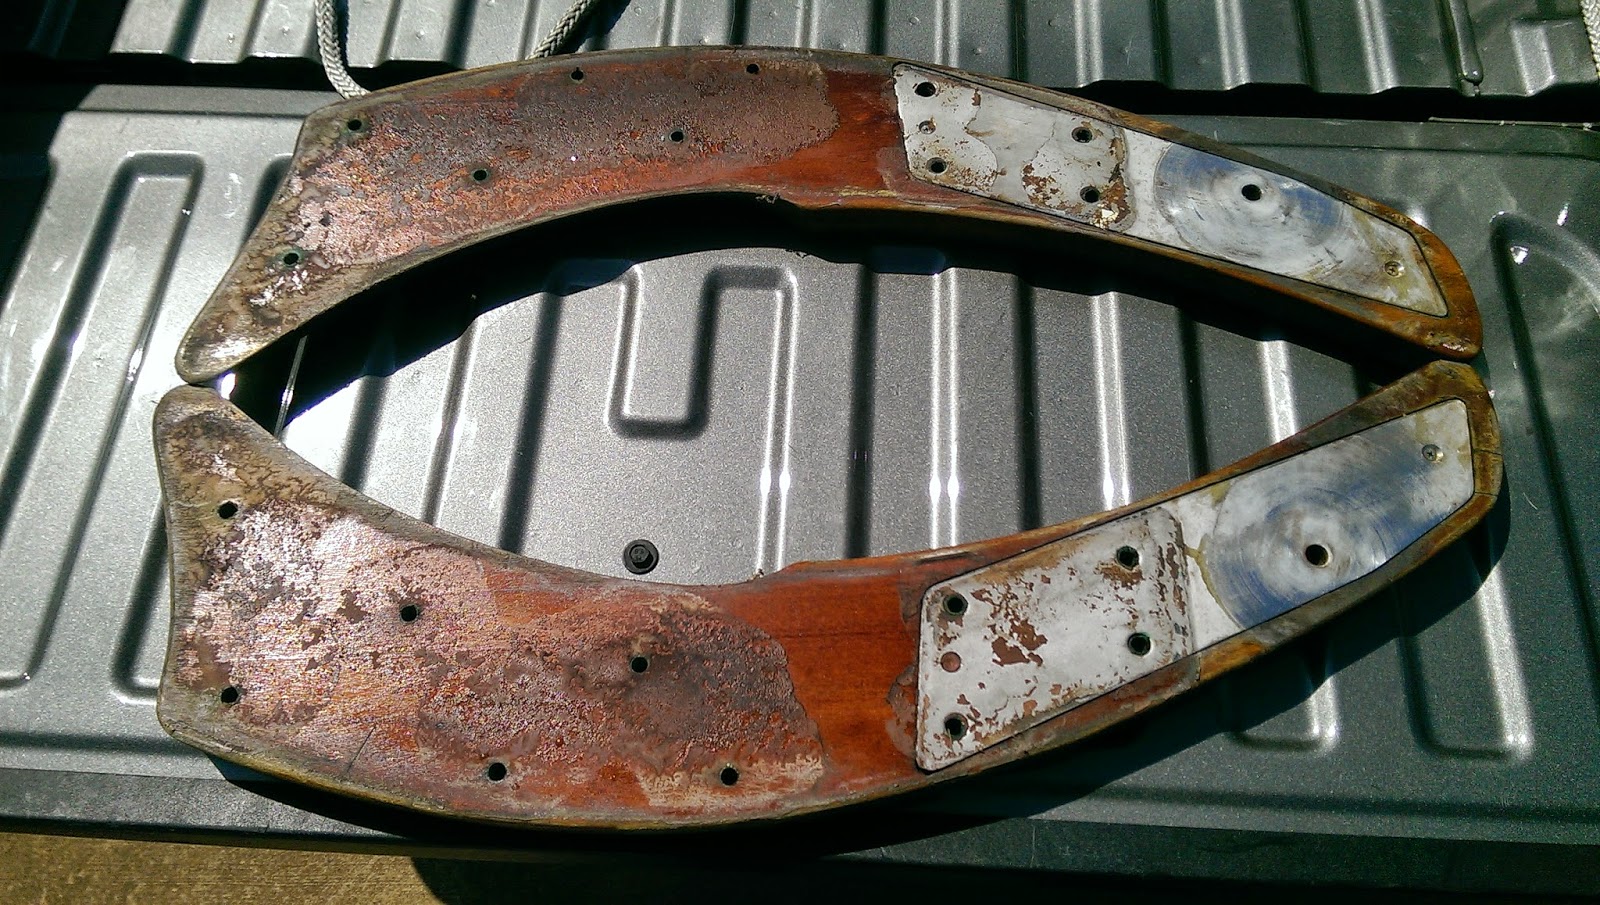
Once I decided to stop using compound, I grabbed some tools and removed the rudder cheeks. I think they're made of mahogany and they're pretty big pieces of wood. The top of them, where the metal backing is at is where the tiller attaches. So, like the way I refinished the tiller, I'm going to refinish these pieces too. Instead of reusing the old carriage bolts, I have some new ones with hex head on them that will make it easier to remove later if needed.


Wednesday, December 25, 2013

Tiller Time

Here's some of the work I've been doing on my tiller I removed from the boat. First to show how it looked before I removed it showing its condition since I bought the boat.


I removed a couple small dowel rods that were on the handle end. The split was pretty good that went through the handle and down about 6 inches.


I used some small screwdrivers to wedge into the end of the tiller.


I got some low density filler and mixed it into some epoxy. I took a ziploc sandwich bag, cut a small part of a corner. With the ziploc, put some of the thickened epoxy mix into the bag and used it to inject into the split. Much like how cake decorators use the icing bags.


I was able to get the epoxy down into the crack and filled the holes the dowel rods were in. I also used some of the epoxy for filling in around a couple bungs (I found they're not being used to cover screws, at least the one on the very end). Removed the screw drivers causing the epoxy to ooze out where I used a clamp to compress it until it cured.


Sanded everything down smooth. At one point, I was using 80 grit on the top since that was in the worst condition. I then used 100 and 220 grit. There is still a few dark parts that show up with the varnish but I didn't want to take too much material off. I think it just adds to its character.


While trying to figure out how I was going to varnish, I decided to bend a hanger around a shelf in a closet and hung the tiller on it with screw drivers in the mounting hole. I used a trash bag under it in the case of drips. The space between the shelf and the tiller was very close but I made sure there was no contact.


The first coat, I mixed mineral spirits with 25% varnish. I wanted to make sure it soaked into the wood.


Second coat, I did while the first was still tacky (over night). I waited for the proper drying time of 24hrs, went outside to sand and for the 3rd and 4th coats, about 50/50 mix.


I did the 5th coat (shown below) with 50/50 again and for the next few coats, I will be going up to about 75/25 that, I think, will fill in what's left of the grain that's still showing and smooth out even more.


I like how it is coming out and looking forward to getting it back on the boat when it warms up. I think the Epifanes finish looks a lot better than the previous finish. For a 32yr old piece of wood, it's turning out very nicely. I still need to get a bolt to replace the bronze one I broke off. I found some 6" stainless bolts that should be long enough at Jamestown Distributors with hex heads I think might work out..

Thursday, October 31, 2013

Hour Meter & Tiller

I went to the boat briefly today. It's rainy and windy so not much else was going on.

I have a survey left over from the previous owner when he bought the boat in 2007. The engine hours recorded in the survey says 714hrs. Since owning the boat, I've run the engine for six or more hours yet the hour meter has not moved.


I used some spare speaker wire I had laying around the house to hook up to the meter to test whether it works. It took a couple seconds but it clicked and started making a sound showing that it did work and moved slightly. I flipped switches, turned the engine key on from the panel and couldn't see anywhere that would get it to work. I'll trace wires around another time to get it working along with the engine.

That didn't take long but the main work was to remove the tiller. The nut and bolt are made of bronze. I first used a dremel to cut a slot on the head of the bolt. Using a wrench and a heavy duty screwdriver, the still wouldn't budge from each other. I then took the dremel and cut away from the nut. I then used a smaller screw driver to pound the bolt out of the hole. The tiller was still tight between the rudder cheeks so I had to work the bolt out while moving the tiller up and down.

Now, it's at the house where I will have it kept indoors while it dries out. I can then strip it down of the old varnish, fill in some holes, epoxy a split and then refinish it.

Cut up nut and washer


Port side of rudder cheek

Starboard side of rudder cheek

Saturday, October 26, 2013

Head Hoses Removed

I spent a good part of the day removing the hoses from the head. Everything went well, mostly.

I first removed the vent hose. I had to route it past the other hoses and through the counter top. I ended up breaking the part the hose was attached and left the hole open.

The hole is to the right of the black hose


The vent is just below the toe rail. The silver cap is for waste
The first part of the larger hoses I removed was from the waste deck fill to a switch between deck pump-out and overboard discharge. The worst part of this was there was a little deposit left in the hose. Thankfully, there wasn't much but it did smell pretty bad for a moment. Thankfully, I had lots of paper towels and some cleaner/disinfectant. I covered the hose with a plastic bag and a rubber band.


The dark part by the thru-hull is the mess made.
After covering the hose with the plastic bags, everything else wasn't too bad. I removed the rest of the hose going from the manual pump to the overboard discharge thru-hull.

Here the hoses are on the deck that I soon put in a black trash bag.


Removing the hoses from the head cleaned up the space under the counter. The white hoses that are left is for the bilge pump. The clear ones are for the sink that's in the head. I'm thinking to remove the sink from the head. With the size of this boat, it doesn't seem necessary to me to have a second sink. I also cleaned up some more of the space, like the caulk that held the head/holding tank and the dirt covering the counter. Now it's more ready for installing an Airhead.


 I was thinking of how it would be to remove and cover the thru-hulls when I haul the boat and make some more room under the counter. Another thought is to keep the thru-hulls in place, at least the one under the counter, maybe for a watermaker in the future. Of course I'm not going to continue with the one used for the head so it'll be replaced with a new one. The other thru-hull to consider is the one that was used for the head's water intake. It's right next to the battery so I'm thinking that can definitely be removed and covered. One less thru-hull to worry about.

This thru-hull can be removed
I was going to remove the tiller to bring home to refinish it and fix the crack on the hand-hold end. When I went to loosen the nut, the whole bolt turned as well. Now, I'm trying to think of how to remove it. There's no way to hold both ends. The smooth side is recessed. I'll have to figure out how to remove it in order to refinish the tiller.