Showing posts with label Rudder. Show all posts

Tuesday, June 18, 2019

Last Cockpit Seacock

Had another good weekend. Got the last seacock installed for the cockpit drains. Trying to do it myself wasn't easy though. I used the boat hook to keep the thru-hull in place and got the seacock base started on the threads. I then used a zip-tie to attach to another seacock to keep it from spinning. Got out of the boat and tightened the thru-hull down. Epoxy squeezed out from the base, that needed cleaning up. Luckily I was able to do this early in the morning where I could wait the whole day for the epoxy to cure. Unfortunately, I didn't finish curing. The outside of the fiberglass base was solid but when I removed the thru-hull, the center was still pliable/soft. I put the blue drain hose back through the hole for rain water to drain in the meantime. Soon, I'll be able to seal this seacock, and get new hoses on the hose-barbs. The current hoses on the other three are not very secure, at best I was abe to get one hose clamp around the hose.

Other project I wanted to do was attach the anchor chain to the boat. Not sure there was ever a place to attach the chain or rode, so I got a U-bolt, drilled holes to attach it. Then I put a soft shackle I made on it and the end of the chain, so now, when I deploy the anchor, the chain is not all going to find the bottom. The chain is about 140ft, so I could probably cut some of that down and attach some rode. Not sure the rode that came with the boat had ever been used or if it's even good to use.

These two things were projects I've had on my list a long time. I'm happy I can cross off a couple things. A good part of the visit, I was working on the rudder. When I tap on the rudder, there were hollow sounding areas, I cut part of the skin out to get epoxy behind those areas. I plan to post more on this when I have more work on it completed.


Squeezed epoxy into the gap before tightening thru-hull


I may cut the extra length off the threads


Last couple weekends have been pretty productive. I've been able to cross off a few projects off my list. Every little bit helps. Thanks for stopping by.

Sunday, August 24, 2014

Rudder Cheeks

Just thought I'd start this post with a side profile of the boat when I showed up today. I continued using some compound on the last part of the port side. On the starboard side of the hull, I wet sanded by hand with 600, 800 and 1500 grit sandpaper. Used a spray bottle of water to wet down the hull. I started doing compound on the starboard side but got about a third of the way through then decided to call it a day. Temps got into the mid 90s with heat index forecasted at 100-105F. I was drinking plenty of water but I didn't want to over work myself in this heat.
 
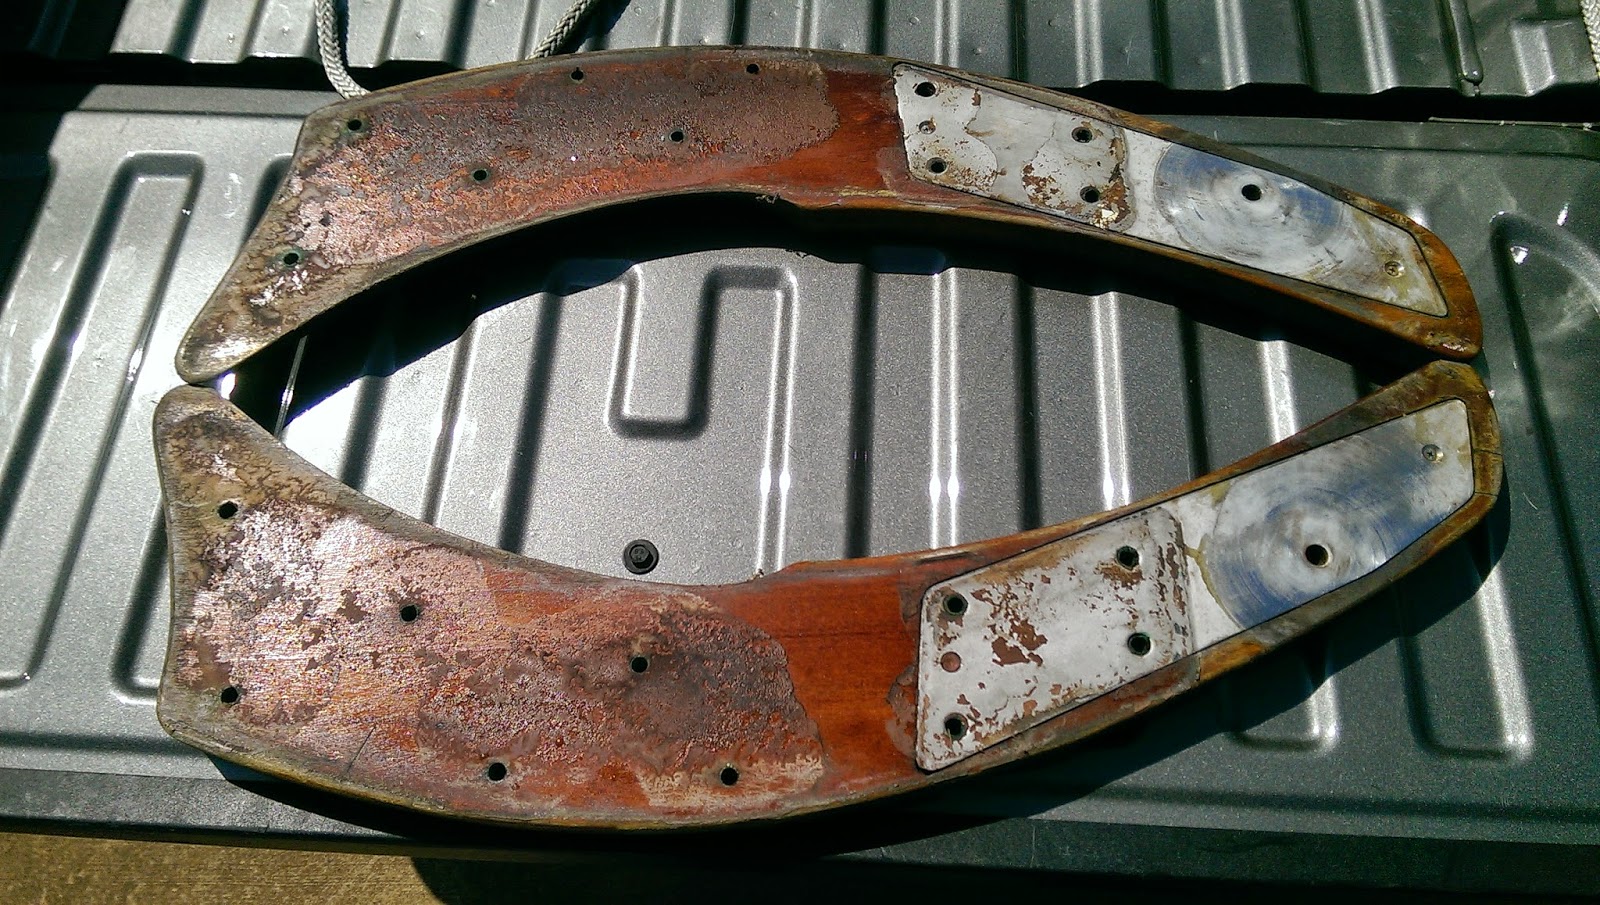
Once I decided to stop using compound, I grabbed some tools and removed the rudder cheeks. I think they're made of mahogany and they're pretty big pieces of wood. The top of them, where the metal backing is at is where the tiller attaches. So, like the way I refinished the tiller, I'm going to refinish these pieces too. Instead of reusing the old carriage bolts, I have some new ones with hex head on them that will make it easier to remove later if needed.


Thursday, October 31, 2013

Hour Meter & Tiller

I went to the boat briefly today. It's rainy and windy so not much else was going on.

I have a survey left over from the previous owner when he bought the boat in 2007. The engine hours recorded in the survey says 714hrs. Since owning the boat, I've run the engine for six or more hours yet the hour meter has not moved.


I used some spare speaker wire I had laying around the house to hook up to the meter to test whether it works. It took a couple seconds but it clicked and started making a sound showing that it did work and moved slightly. I flipped switches, turned the engine key on from the panel and couldn't see anywhere that would get it to work. I'll trace wires around another time to get it working along with the engine.

That didn't take long but the main work was to remove the tiller. The nut and bolt are made of bronze. I first used a dremel to cut a slot on the head of the bolt. Using a wrench and a heavy duty screwdriver, the still wouldn't budge from each other. I then took the dremel and cut away from the nut. I then used a smaller screw driver to pound the bolt out of the hole. The tiller was still tight between the rudder cheeks so I had to work the bolt out while moving the tiller up and down.

Now, it's at the house where I will have it kept indoors while it dries out. I can then strip it down of the old varnish, fill in some holes, epoxy a split and then refinish it.

Cut up nut and washer


Port side of rudder cheek

Starboard side of rudder cheek