Thursday, April 27, 2017

Addition To The Fleet

Wife and I didn't know if we were having a boy or girl. In the months leading up to the birth of the new crew member, I have been building this little cradle boat. It's a kit put together by Chesapeake Light Craft (www.clcboats.com). While this is a small project, the following picture will show a little about how their kits would go together. Especially helpful if you're not familiar with "stitch and glue" method that they use in their kits.

Funny thing, the instructions actually say "Step 1 - Make Baby"

copper wires hold the panels together....

...long enough to epoxy the planks together...

...until it sets...

then removing much of the copper wires...


Then getting ready for epoxy on the bulkheads...

the tape keeping things nice and clean...


filled in holes with epoxy, sanded down
first coat of epoxy, about 5 total
2 coats of primer, 3 coats of topcoat.

Pink anchors! for the little girl

Getting pattern just right for foam

PUL fabric covering foam. (waterproofs it)

Mostly complete, still needing a few finishing touches

cushion in place


Still need to finish out the feet here.

This has been an interesting project. So, while I intend to teach the little one about boating, sailing, knots, etc., she now has her own little boat.

Tuesday, April 18, 2017

Crew Announcement

Hear Ye! Hear Ye!

Let it be known, on this the 18th day of April

Two Thousand Seventeen,

at 02 Hours 18 Minutes,
Greenwich Mean Time,


The Addition of Amira as Junior Crewmember to,

Sailing Vessel Rhapsody.


Weight: 7 lbs. 7 oz. (3380g)


Training begins.

Tuesday, March 14, 2017

Main Halyards

Worked on some line for halyards. Needed eye splices and whipping twine to finish things up. I had bought 180ft of New England Ropes VPC at 3/8" that I intended to make two halyards from. I put an eye splice on each end, then when laying it out, cut it in half and then cleaned up the ends. Now have main halyards installed and jib halyards ready to go. I'll use all four sheeves at the mast head.


cut/burned the ends

main halyards installed


before whipping twine
I also installed the outhaul setup I put together into the boom. I'm thinking I may have to redo a little bit of it, but otherwise, it seems good so far. I'll have to see how it works out once the mast is up on the boat.


Weather got cold again so anything else I'm doing on the boat will be on hold or very slow moving. Sure hope it warms up soon so I can get back to work on major projects.

Friday, February 17, 2017

Getting Wired - Done

Last weekends visit to the boat didn't go as planned. I ended up leaving my cordless drill AND the drill bits at the house. Still, I didn't waste the day. I decided to look at one of the two light fixtures by the galley. This one I looked at has a rocker switch that goes one way for white light, and the other way.... didn't work.

Took it apart to see little compact fluorescent lights. One, on the side that wasn't working, with a red cover over the light for night time viewing. When I took down the fixture, I saw on the circuit board what looked like a diode had burned up and melted part of the fixture housing. Now, this side of the light has not worked since I bought the boat, so someone somewhere was probably very lucky to not have an electrical fire on board.

I thought of replacing the whole fixture but then talking with someone about that possibility, it was suggested I do something with LED strips... then remembered I still had some left over from lighting up the head. So, I got right to work taking out the circuit board out, and putting in a couple strips of LEDs. So, like it was originally intended, one side is white, and the other side is red.


So that was last weekend. For this weekend, so far, I finished the last bit of wiring today. Since I had a breaker panel made for the nav desk, I still needed to get power to it. I took 4 gauge wire and with some drilled holes, routed it halfway down the boat to the nav desk.


So now, I have a working VHF radio. I still need to route new RF cable between the radio and the bottom of the compression post where the cable going up to the masthead antenna will be connected.

Progress is good. :-)

Monday, January 30, 2017

Getting Wired Part 3

Got some wire supplies the other day. Had some additional wire I needed to replace/clean up. Mainly, I wanted to move the wires that cross in front of the engine out of the way. Along the way of planning this part of my refit, I saw one wire that wasn't even tinned (went to the starter), and most of the connectors didn't have any sort of heat-shrink. I felt it was a good idea to remedy those items.

I saw a lot of the wires went to a single-stud bus bar... not really a bus bar since there's only one post, but I wanted to install an actual bus bar to spread things out and have things better organized. The positive also has a cover. It was a little tight installing that one since there was so many other wires in the way but I got it where it would work out.

I found special connectors to use on this project. You'll see in the pictures below, they are 90 degree lug terminals. I mainly bought to come straight out from the selector switch to keep the wire from sharp bends. I previously had connectors touching at the battery switch so I wanted to prevent that. Now, when the switch is set to off, it's really off. The terminals are made by Panduit. The battery switch has 5/16" studs on the back so I got three of them (LCB2-56F-Q), and I bought one 3/8" (LCB2-56F-Q) that worked out well going from a fuse connected to the house battery and goes to the selector switch. (note: the description says pack of five, but the price is for individual connectors).

cleaning up these wires in the way

supplies laid out

old POS side

Old NEG side
 
Cover base

Bus Bar installed

Covered

first wire to the selector switch, going to the bus bar


The wire supplies didn't stay organized for very long, but still somewhat grouped together. The large tool with red handles are not bolt cutters, but actually a crimping tool for heavy duty lug terminals (for wire larger than 6ga). The yellow handled tool is a wire/cable cutter. Makes some nice clean cuts. The blue handled tool is a ratcheting type for crimping smaller gauge heat shrink (not insulated) terminals (the red, blue and yellow terminals in the bags).


It's pretty time consuming to take old wires out, run the new one's in, set the terminals, crimp, heat shrink, then install. While it doesn't look like much, I'm just getting started. Plenty more to follow on this project.

Wednesday, January 18, 2017

Galley Hose

Short post.


I did some cleaning up inside the boat this past weekend. Since I wanted to replace the flat-head screws on the side paneling, like I did in the forward salon/v-berth area, I cleared out the port quarterberth and removed some screws. While I was at it, I added some of the same insulating material. Only able to do a couple parts as I ran out of what I had on hand. At the same time, I replaced a hose that went from the fresh water tank below the quarterberth to above it. I think it's for venting and to keep from the tank from being damaged from a vacuum when being used. The hose was a bit disgusting inside and it was sticky all around. I think something left over from when the boat was infested with bees.


close up of old hose

old hose in the trash

New hose in place along with some insulating material
Lastly, I got a small tube of Sikaflex 291 that was used to bed down the seacock. Once this was done, I attached a small piece of 1-1/4" ID hose. I closed the seacock, put some water in the sink until it came to the drain and waited. No loss of water, no leaks. Job well done! Still need to put the thru-hull on, but thinking to wait until I do some work on the bottom.


the other seacocks are waiting to be installed for the cockpit drains


In the meantime, I'm making plans for making an order of electrical supplies (wire, terminals) and waiting for it to warm up so I can continue on other projects. Sometimes, these small projects make a big difference in between the major projects.

Friday, January 13, 2017

Nav Desk Panel

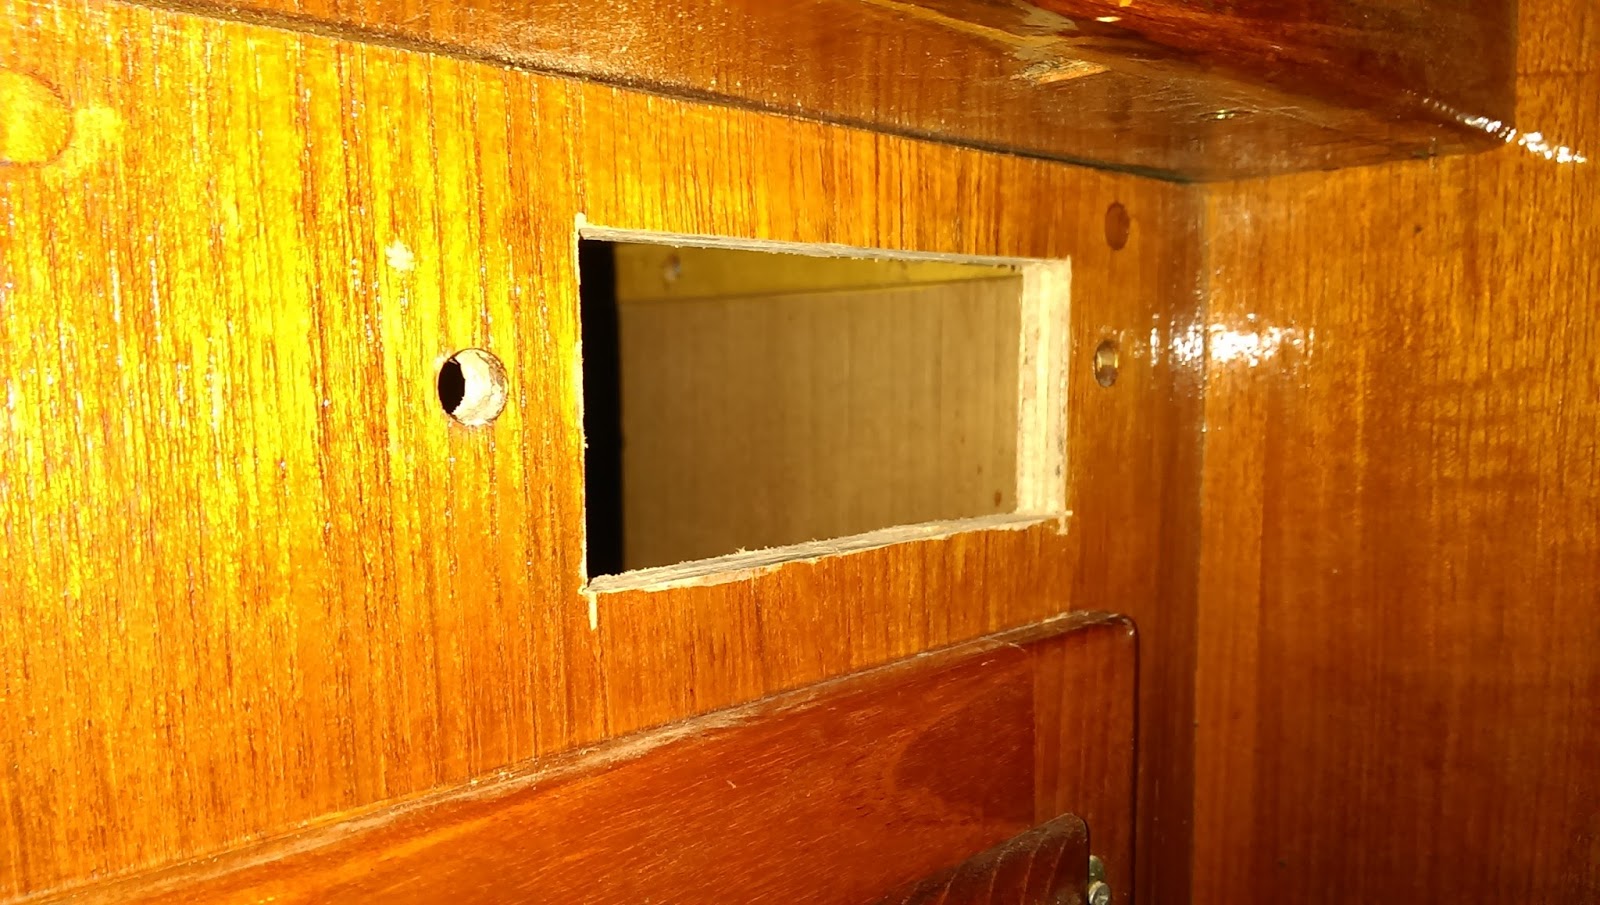
In a previous post, I showed a little breaker panel that I ordered from Front Panel Express. I wanted to place it under the nav desk where an old car stereo was located, that I had already removed. Last weekend and today, I cut the hole a little larger to accommodate the breakers. When I tested the fit, everything worked out fine. Plenty of space. I only have two breakers for now, but will get others another time. The only other thing I need to do at this point is to screw it down to the cabinetry and wire up the VHF above the nav desk.

Small project, but the recent cold weather keeps me from doing other major work. A small step forward, but it's still progress


the small holes on either side were from the old car stereo