A lot of things have happened since my last post to this blog. I've been working on a college class so that has taken up a lot of my time. I've also received notification for a trip overseas for work that could last four to six months. My wife saw the boat for the first time and I thought I would take her for a sail, then find out the batteries were dead. The starting battery was just over 10 volts and the house battery was just under 9. From what I can tell, the shore-line charger went out on me. I was originally going to haul out in September or October to get ready for a work related move but with everything going on, I decided to haul out. So I took my car battery and a set of jumper cables and got the engine running so I could move it to the dock for haul out. Yesterday, it was hauled out, bottom pressure washed, and loaded onto the trailer and took it home, or rather to the storage lot in town.
The boat felt good during the tow. At one point, on a smooth part of the road, I didn't realize at first but I was going quite fast (75mph). No sway in the trailer at all. When I realized how fast I was going, I decided to bring it down a bit and went 60-65 on the bumpy part of the highway for the other two thirds of the trip. Drive down took an hour and now, she's tucked away in the storage lot again about 20 minutes away. Now, I plan on working on a sort of refit getting things fixed up.
Here's a list of some of the things I am looking at eventually doing:
1. Replace seacocks: Replaced one already and have 7 more. 1, maybe 2, from the head I removed I'm looking at removing and covering the hole(s) with fiberglass. The one I defiantly will remove was from the head water intake, that's located by the starting battery box. The other I'm considering is the overboard discharge. The discharge one I thought of just replacing, but not using, not sure yet.
2. Finish installation of Airhead: Need to connect electrical for the vent fan and connect vent hose.
3. Replace Fuel tank: Found out when I got the boat in the water and filled the fuel tank, that it was leaking so the boat yard pumped out the fuel. Need to eventually figure out how I'm going to remove engine to get to it. I've had some previous advice that will be helpful and of course plenty of info on the Nor'sea Group archives.
4. Hoses: Looking at replacing hoses for sink and cockpit drains and possibly those on the raw water lines on the engine.
5. Paint: Looking at repainting the stripe by the toe-rail. It's currently a worn down light blue than I'm looking at painting to a dark red. May consider painting the waterline stripe too. I thought of painting the topsides but now just thinking of going with regular compound/wax. The interior storage compartments are painted a yellow color that I want to paint with Bilgekote or maybe something else to brighten things up. When replacing the fuel tank, I want to paint the engine compartment too.
6. Exterior Wood: I'd like to refinish the wood. I know a lot of people say "leave it grey" but I like the look of varnish. I'm hoping the extra effort will turn out good results. I'm also interested in making a split door for the companion way to be able to close things up quicker, like being out on the water and a squall line shows up.
7. Canvas: Much of the canvas on the boat was worn when I bought the boat. Everything looks like Pacific Blue Sunbrella, which many boats have. I'm looking at changing the canvas to Linen color (light tan). I have thought of making a cover for the entire boat too.
8. Mast step: There are a couple times I visited the boat while it was raining and saw water at the top and bottom of the compression post. The step needs to be resealed. At the same time, I thought of replacing the mast wiring and there's a couple plugs coming through the mast step that would need looked at too.
9. Chainplates: There are other Nor'sea owners who have boats as old as mine and while removing their chainplates, they fell apart in their hands from hidden damage. With how old my boat is, I figure it would be good preventative measures to replace them so there is no doubt to their age and condition.
There's plenty of other work in mind. This list is a start of what I have planned. I'm expecting this refit period to take a few years but I'll see how it goes once things get started. This list may seem ambitious but it's not something I expect to get done quickly by next season. I'm thinking a few years but reality may end up being longer.
Only time will tell.
Showing posts with label Sunbrella. Show all posts
Showing posts with label Sunbrella. Show all posts
Wednesday, July 16, 2014

Sunday, September 8, 2013
Wasps
There seems to be quite a few wasps around. Last weekend, I took the mainsail cover off and found a couple mud clumps around, then raised the main sail and found more within the folds of the sail. Today, I went for just a short time and did some cleaning/organizing.
Today, like last week, there was a wasp that was flying in and out. Last week, I just sucked the thing in the vacuum and that was it. Today, I did something different. I wanted to keep things out of the boat. There's also a lot of spiders around too. It doesn't take long for them to build their webs either.
Just as I was wrapping up the cleaning, the wasp I saw today flew in as I was closing things up. I took some green tape I had on hand and used it around the opening of the companionway boards and hatch. This sealed things up pretty good, I think. The opening is about 1/4 inch so anything can fly/walk in as they please.
Here I taped it up on the inside of the cover and outside of the boards.

This wasp I mentioned isn't a small one either so I'm really not comfortable with them flying around me. The two holes in the front of the hatch is for the Nor'sea plate that came with the boat that I will attach after doing some finish work on the wood. So, those two holes are a little too small for the wasp to get through. I made sure to tape around side corners too.
The hatch as a clear (mostly) top that anyone could look down into. It didn't take long, but the thing was flying into the hatch. It really wasn't too happy. It was flying into it and walking around trying to find a way out.
I took some video trying to get a shot of it. it's about 1 1/2 inches long. This is a still picture of the flying visitor.

The few I've actually seen are all about the same size. When it starts getting colder, I plan on going through all over the boat to make sure there is no clumps of mud hiding anywhere. I did find it interesting that one of the clumps I found last week on one of the mast winches had dead spiders inside it. Saving for later?
Creepy little things. Now if only I could get rid of the spiders, that would be great too.
In hopes to at least keep the flying critters out, I'm thinking to make a couple hatch covers. One with Sunbrella canvas material to block some light and another made with a mosquito net I happened to have sitting around the house that will still allow airflow through the boat. I could use some sewing practice anyway.
The previous owner had the boat stored on its trailer in Arizona and it got infested with bees and now in mid Kentucky, I have wasps and spiders. How fun (sarcasm).
UPDATE: I just looked up some info on wasps. I found out that because of the mud clumps, this is actually classified as a "mud dauber". I read stings are rare but I'm sure it's possible so I don't want to take any chances. I read that there are eggs inside the mud clumps so another good reason to look throughout the boat to get rid of them.
Today, like last week, there was a wasp that was flying in and out. Last week, I just sucked the thing in the vacuum and that was it. Today, I did something different. I wanted to keep things out of the boat. There's also a lot of spiders around too. It doesn't take long for them to build their webs either.
Just as I was wrapping up the cleaning, the wasp I saw today flew in as I was closing things up. I took some green tape I had on hand and used it around the opening of the companionway boards and hatch. This sealed things up pretty good, I think. The opening is about 1/4 inch so anything can fly/walk in as they please.
Here I taped it up on the inside of the cover and outside of the boards.

This wasp I mentioned isn't a small one either so I'm really not comfortable with them flying around me. The two holes in the front of the hatch is for the Nor'sea plate that came with the boat that I will attach after doing some finish work on the wood. So, those two holes are a little too small for the wasp to get through. I made sure to tape around side corners too.
The hatch as a clear (mostly) top that anyone could look down into. It didn't take long, but the thing was flying into the hatch. It really wasn't too happy. It was flying into it and walking around trying to find a way out.
I took some video trying to get a shot of it. it's about 1 1/2 inches long. This is a still picture of the flying visitor.
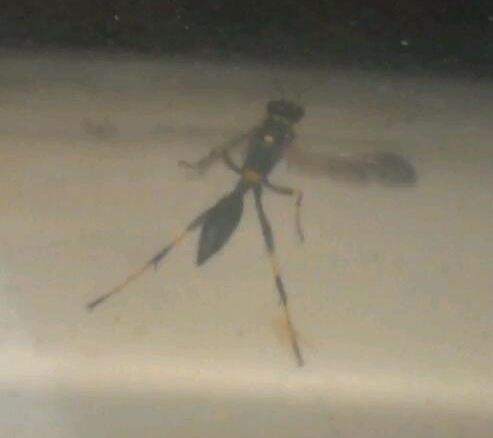
The few I've actually seen are all about the same size. When it starts getting colder, I plan on going through all over the boat to make sure there is no clumps of mud hiding anywhere. I did find it interesting that one of the clumps I found last week on one of the mast winches had dead spiders inside it. Saving for later?
Creepy little things. Now if only I could get rid of the spiders, that would be great too.
In hopes to at least keep the flying critters out, I'm thinking to make a couple hatch covers. One with Sunbrella canvas material to block some light and another made with a mosquito net I happened to have sitting around the house that will still allow airflow through the boat. I could use some sewing practice anyway.
The previous owner had the boat stored on its trailer in Arizona and it got infested with bees and now in mid Kentucky, I have wasps and spiders. How fun (sarcasm).
UPDATE: I just looked up some info on wasps. I found out that because of the mud clumps, this is actually classified as a "mud dauber". I read stings are rare but I'm sure it's possible so I don't want to take any chances. I read that there are eggs inside the mud clumps so another good reason to look throughout the boat to get rid of them.
Friday, March 15, 2013
Sewing Machine
On a previous post, I was talking about wanting to do some canvas work. I researched sewing machines that were popular and went ahead and ordered a Sailrite LSZ-1 sewing machine. It came in yesterday. I ordered some other accessories to go along with it and everything came in large boxes. The black transport case and the machine itself came in to individual boxes within a single large box. It was pretty big and heavy. Another box had accessories that I ordered along with it. I ordered a yard of 60" Marine Grade Sunbrella, Linen color. I got only one yard to start off with smaller projects at the moment as I learn the machine. I got a white 1" binding strip to go along with it for the edge to give it a nice finished look. At least, that's the idea. In order to cut Sunbrella, I ordered one of Sailrite's hot knives too.
It's a heavy machine. In the accessory kit I ordered included the heavier balance wheel and that is pretty heavy itself. First impressions, it looks like a good solid machine that will last some time.


Friday, March 8, 2013
REFIT Plan: Canvas
I've been looking at the fabric on the boat and see that it is well worn and in some places, frayed too. Since many boats use Sunbrella brand fabrics on their boat, what I have appears to be Pacific Blue which seems to be a pretty popular color considering so many boats have it.
What I've been looking at lately is to change out my fabrics on the exterior to Sunbrella's Linen color. It's a nice tan that will really lighten the deck space.
What to change.
Well, the forward hatch, shown in the picture above would be replaced, along with the mainsail cover, winch covers, tiller cover and looking to add covers for the deck handrails to protect the recent varnish work. There's also a dodger, which I haven't seen yet as it's stored in the head and just haven't pulled it out yet. I'm also looking to someday have a full boat cover.
Down below, the cushion fabrics, while decent condition, look to be a bit dated. I'm also looking at using a lighter color, whether linen like on deck or patterned, it's something I'll look into when I get to that project. I'd really like for everything below to match. I might change out the foam too which currently has a yellow foam with white batten.
How to do it.
Many people look at getting new fabrics and go to a professional. Personally, I like trying to figure things out on my own. I like the idea of learning all the systems on my boat and will help me when maintaining everything too. I've been looking around on Cruisers Forum and Sailnet to get ideas on sewing machines. I decided to get a LSZ-1 along with some accessories from Sailrite. I like the features of the machine and that it can also be used manually when power may not be available. What's really nice about Sailrite is that they have many how-to videos on their website. They will be helpful when learning sewing techniques and ideas for projects.
Another source I'll have for ideas will also come from a Sewing Group on Cruisers Forum. It's just getting started and will keep growing as interest continues.
While this will be part of my refit I hope to start in a few years, I may still do a few projects in the meantime.
 |
| Forward Hatch Cover |
 |
| Tiller Cover |
What I've been looking at lately is to change out my fabrics on the exterior to Sunbrella's Linen color. It's a nice tan that will really lighten the deck space.
What to change.
Well, the forward hatch, shown in the picture above would be replaced, along with the mainsail cover, winch covers, tiller cover and looking to add covers for the deck handrails to protect the recent varnish work. There's also a dodger, which I haven't seen yet as it's stored in the head and just haven't pulled it out yet. I'm also looking to someday have a full boat cover.
Down below, the cushion fabrics, while decent condition, look to be a bit dated. I'm also looking at using a lighter color, whether linen like on deck or patterned, it's something I'll look into when I get to that project. I'd really like for everything below to match. I might change out the foam too which currently has a yellow foam with white batten.
 |
| The red cushions are for the quarterberths |
How to do it.
Many people look at getting new fabrics and go to a professional. Personally, I like trying to figure things out on my own. I like the idea of learning all the systems on my boat and will help me when maintaining everything too. I've been looking around on Cruisers Forum and Sailnet to get ideas on sewing machines. I decided to get a LSZ-1 along with some accessories from Sailrite. I like the features of the machine and that it can also be used manually when power may not be available. What's really nice about Sailrite is that they have many how-to videos on their website. They will be helpful when learning sewing techniques and ideas for projects.
Another source I'll have for ideas will also come from a Sewing Group on Cruisers Forum. It's just getting started and will keep growing as interest continues.
While this will be part of my refit I hope to start in a few years, I may still do a few projects in the meantime.
Subscribe to:
Posts (Atom)