Showing posts with label Paint. Show all posts

Sunday, March 22, 2015

Many Projects.

Been a while since I posted but this is what I've been up to lately. Winter projects continued but even those were slow going.

I want to expand my battery capacity so I build a battery box to replace the one I had before. I took some 6oz. fiberglass cloth and lined the inside of the box. Still not done yet as I want to cut away a little near the top for the thick battery cables to make their way to the battery terminals. There's a few touch-ups that are still needed but overall, I don't think it's all too bad.


One day, while visiting the boat, I decided to grab the ships bell for cleaning. When I got the boat, the bell wasn't in the best of condition. Before I used Brasso. It made the bell look really good, or so I thought. This time, I was going to use the same thing but decided to use some Collinite Metal Wax. I used this metal wax on the bell and it bought it from dull to a really nice mirror shine.


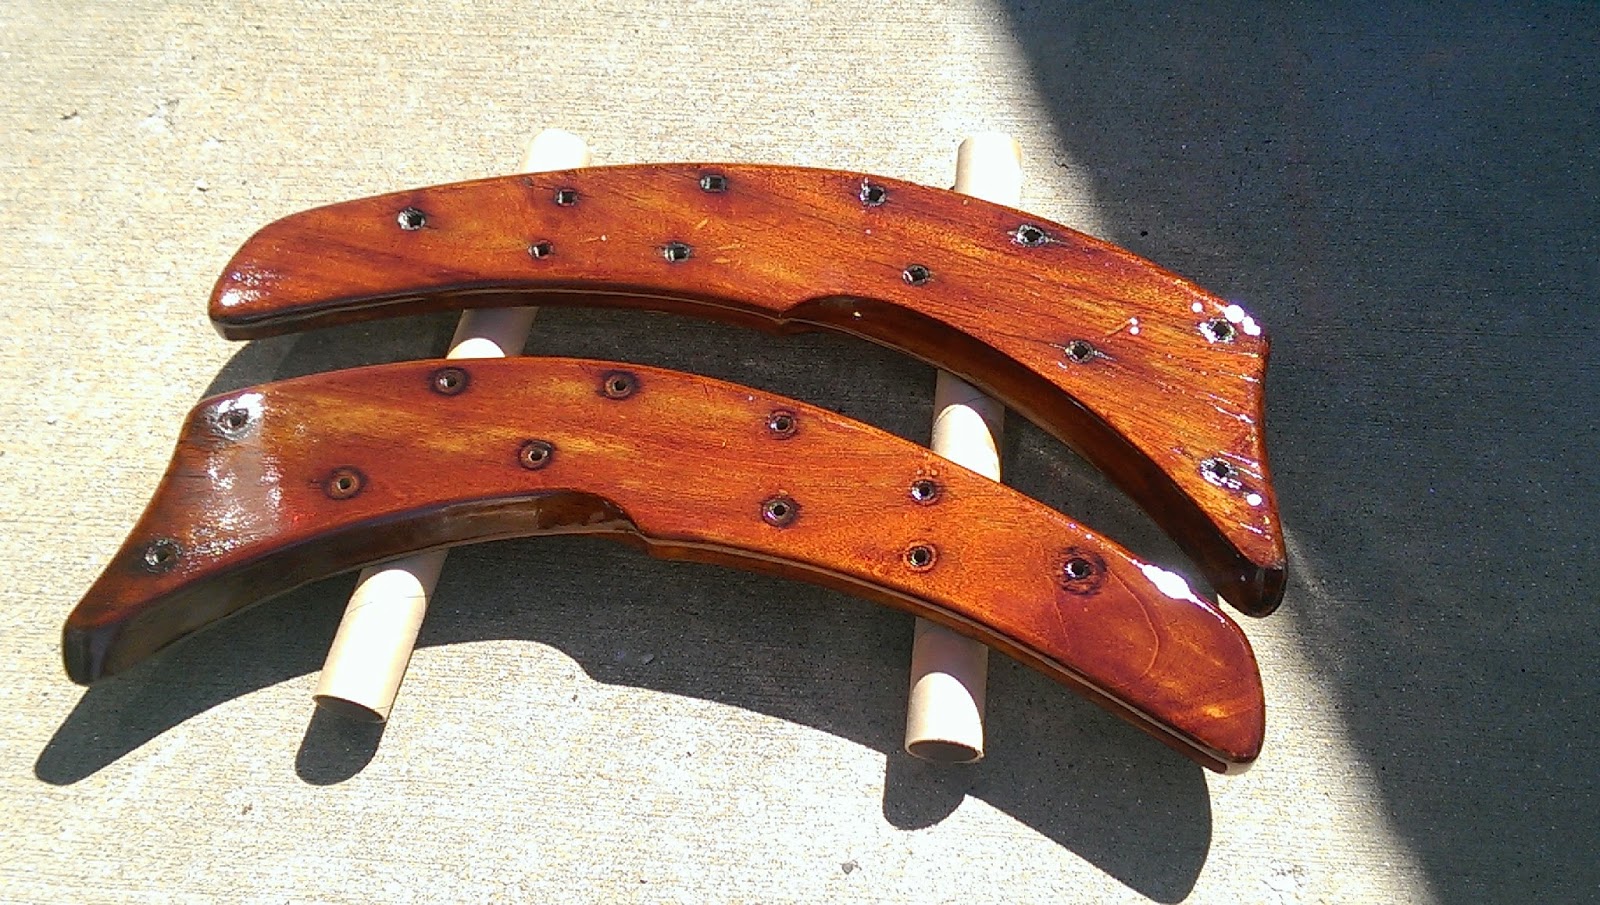
In a previous post, I mentioned taking the rudder cheeks off the boat to refinish. Right now, they have 5 coats on and a few more before they would go on the boat. I also refreshed the varnish on the tiller too.




I bought a Sailrite sewing machine some time ago but haven't really tried putting it to use. I sewed the ends of a webbing strap that would be used to hold the battery box down once it's on the boat. I also have a buckle that will get sewn onto the webbing too but haven't gone that far yet with it. At the same time I got the sewing machine, I bought a yard of Sunbrella Linen marine grade fabric. I got only a yard so I could practice with it. So I tried making a cover for the forward hatch. I think it turned out pretty good but when I took it to the boat this weekend, it was a very close fit. It could work for now but I think it could be made better.


A week ago, I went to the boat and found out the bilge was full of water. I used the manual bilge pump and got it out of there but thought of how it got there. I opened up the floor boards and opened the panel towards the engine. The engine was very wet. Then I thought of the most recent snow we had that was immediately followed by a lot of rain. So what I think happened is with the snow in the cockpit, the drains were blocked. So, when it rained afterwards, it had no other place to go so it got into the boat through the engine instrument panel. Another reason why I think that is what happened is because one of the cockpit lockers was also full of water, which has never happened before. I had a sponge in there so I soaked up all that water to clean it out. So now, I hope for a dryer boat. To prevent future leaks through the engine panel, I'm going to get some 4200 and seal up around the edges. I was also given a suggestion to move the pull-stop to the inside of the boat. I think I'll take that suggestion. Anytime I pull it from the cockpit, the engine panel lifts up. with that, I'll look for a place I can move it to.

I've started removing some of the bottom paint to get it ready for paint later on down the road. I got the rudder cleaned off for the most part. Found a lot of spots that looked like it was damaged before, possibly from blisters. Needless to say, there's going to be quite a bit of work to fair it out for a smoother look. I also found a spot that is cracked that will need to be filled too. I'm planning to keep the bottom cleaned off until right before I can get the boat back in the water again, which might take some time but at least it would be ready to go.


And the latest is the trailer the boat is on. I found out there's a place for brake fluid. I hadn't thought of it before so I wasn't looking. Well, the reservoir the fluid goes into was empty and dry. I bought a pump to try bleeding the lines but so far hasn't worked out so well.

I'll be moving in the next couple months from Tennessee to Northern Virginia so I have some work to do to make sure the boat is ready to move. I'll travel there first to scout out the area until I find a place where I can move the boat to. Then projects will continue along the way.

So, until next time...


Sunday, November 23, 2014

Splatters

This post I should have done at least a few weeks ago. Got distracted because of work being crazy busy lately.

The last time I did any painting on the boat, it had warmed up a little that day from the previous week. Not bad, right?

Well, warmer weather brought on some (ok, a LOT) of flying things. I thought the last coat of paint was going on pretty good but the downside of it was a bunch of gnats flying around. It seemed like they were attracted to the paint. That figures!

Not only were they trying to fly into the cup the paint was in, but they were flying into the paint on the boat too while it was still wet. Frustrating, to say the least. I figured I could get them off by washing the areas and/or when I sand for the next coat. Either way, they're done for.

Can you spot them in this picture? all the little black spots on the paint, those are gnats.


I went down the starboard side, got gnats. Went down the port side, then a new surprise.

I was painting with a plastic cup. You know, the one's you use for picnics. Well, by the time I was finishing up on the port side, I look into the cup and saw there wasn't as much paint as only a moment earlier. Turns out that the paint (or maybe it was the thinner) had eaten through the plastic.

The paint didn't just leak out the cup, it got all over the ladder, the ground, part of the trailer and down a pant leg and part of my shoe and on the BOAT. I was wearing gloves so I didn't feel it running down my hand.


With the streaks on my pants, I was thinking it looked like I had a nose bleed. So, a good pair of pants are now work-pants, for boat work and yard work, etc.

During the same visit, I took out the Garmin 546s to sell as I intend to upgrade someday to a larger-screened and more "proper" chartplotter. The latest from Garmin, like the 741xs is looking nice. I'd like to install a new radar and have it all integrated. So now the swing arm is empty of electronics for now. But all that will come later in the refit.


Some good news, due to good timing. I've been looking at battery chargers to replace the 10 Amp charger I had before. There were a couple of them that I was considering. While looking at Cruisers Forum in the classified ads, someone had just listed a ProNautic 1230P charger. Apparently, the guy who listed it bought it then changed his mind for what he wanted to do. So, I nabbed it up quickly as it was at a discount from the list price shown on Defender's website.

It's bigger than I expected it would be so now trying to figure out how/where to mount it, then may have to make new wire runs to hook it all up.

Monday, August 18, 2014

Check Your Chainplates

I've heard it before by others for everyone's awareness to check chainplates. Other owners of a Nor'sea 27 have changed out their chainplates on 30+ year old boats because they saw cracks or ended up finding out there were cracks in them during removal. Like the old saying goes, nothing lasts forever and these chainplates are no exception. One owner took his chainplates off and while making the video, one broke in his hand.
 
While removing my chainplates, I noticed. some pitting and surface rust. They didn't really look TOO bad to me and still felt pretty solid. Then, I was down to two. The bow and the aft chainplate on the port side. The bow took a little time as it was flush with the surface and didn't want to lift up at first. The last chainplate on the side was another story. Each plate for the shrouds have a little block of wood for spacer. The bolts going through them stayed solid in place until I banged them out, but prying the plates from the boat was difficult because the bolts didn't budge. When I went to pull the last chainplate, it gave a little.
 
I thought it was odd since all the others were pretty sturdy but now I got one with a soft spot. Turns out, there was a hidden crack in it. It was hard to see at first but once I removed the spacer block, I pulled on the plate to exaggerate the bend to show the crack easier. It went right to the bottom of a bolt hole. It ended up leaving one bolt holding the half-shroud that was attached to it.
 
Can you see the crack?

How about now?
 
Pulled it to have it show up more
 
You can see the crack here with one bolt before the shroud attachment

Broke to show how much metal (on the left) was actually holding it together.
This is how the boat looked behind each chainplate.


Here I am, sitting inside the sail locker removing the nuts holding the bow chainplate in place. Just shows that a guy my size (6'5") can fit anywhere in my boat (mostly).

 
While I didn't take pictures of the chainplate areas after I cleaned them up and sanded, I can say their areas are looking much better, at least on the port side. I've started doing some sanding on the port side. I used 400, 600 and 800 all dry. Then, I read something that the sanding should be done wet so when I went to 1500, I used a spray bottle to wet the areas and sanded some more. It's looking much better so I hope this whole process is worth the effort.
 
I also have a compound that I found. It's made by Meguiar's and it's listed as a one-step compound. I also got a paste wax, Collinite Heavy Duty Paste Fleetwax that I'm hoping to bring the hull to a nice shine.
 
Here's how it looks after some compound. It'll need some more work but it's getting there. It probably hasn't been done in many years so anything is an improvement at this point. This is the first time I've done it since buying the boat a little more than 2 yrs ago.
 
 
Another project I'm looking at doing while the chainplates are off the boat is to repaint the blue stripe up by the toe rail. My favorite color is dark red. So, I looked around at topside paint and decided to get one in the color I want. It's Burgundy by Pettit Easypoxy. I'm thinking of re-painting the waterline too but not sure now if it's the right paint for it. Maybe someone reading this could advise me on this. The waterline will wait for now so no hurry. The top stripe is needed sooner before I get new chainplates in place.
 
Here's a quick snapshot of the color I bought. So more sanding, prep work and priming, etc.
 
Doesn't that look nice? :-)
Plenty to do on this old girl but it'll be worth it in the end.


Saturday, August 2, 2014

Some Dis-Assembly Required

Part of this refit is to break things down in order to build it back up again.

I'm looking at doing a few things at the same time. I want to repaint the blue near the toe rail to a dark red. Not sure what type of paint to use yet. I've looked at Interlux Brightsides, Pettit Easypoxy, Awlgrip and whatever else I can find. Brightsides has "Fire Red" but to darken, would require some mixing. Awlgrip and Easypoxy has dark red and due to costs, I'm leaning toward Easypoxy, unless I find something else or a different kind is suggested.

In order to prepare for this, I removed the name off of the port side, not yet on the starboard. There was a sticky residue left over after I scraped off the letters. I looked up online what could be used and saw something about acetone. I tried it and it cleaned it up nicely.


sticky residue left behind after scraping

after acetone cleaning

I also used an electrical palm sander a little bit. There was a spot that sanded through to a darker color underneath and a spot that was chipped. I'll have to sand down some more but not sure how far to go at the moment. What ever was used for the current color, there was a little bit of a reflection on it. I might sand it smooth, put on some primer and put whatever I get over it. With a new color, I can then add new set of letters for the name, whenever I get some.

Sanded through to a darker blue

I plan on replacing the chainplates. Not because they're bad. Actually, they don't look too bad but they're old and for preventative measures it's good to make sure they're updated. Removing them from the hull sides, it will give the repainting an even surface.


Removing stern chainplates
The sides were not as accessible. I had to remove the panels to get to the bolts for two of the side chainplates. The same way on both sides. The big washers on the sides were epoxied into place so they're not coming off. After getting the chainplates off, I just needed to scrape some of the caulking that was used off the boat and the chainplate.


The third chainplates on each side will be a bit more difficult. The panels are not setup in a way to pop off or slide out of the way. Looks like I might have to cut away some of the paneling and add some trim to hide the cut. At least that's an idea I have. One side, I have the galley and the other side, I have the nav desk. The panels behind each extend behind another piece of wood or bulkhead. So creativity is needed.


Overall, I got the two stern chainplates and two from each side off. I still have the third chainplate on each side and the one on the bow to remove.

So, some disassembly required.