At least I hope all is ready. Everything seems to be working so far.
This weekend was busy. I replaced the valve cover gasket on the engine and rigged up the sails.
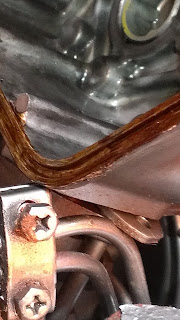
The area at the base of the valve cover showed some oil that had leaked. At first, I thought the oil came from a failed head gasket but after a closer look, I saw it was actually the valve cover gasket.
Here is my first look after removal of the valve cover. I saw there was some buildup of dirt, possibly of where the oil had leaked.
I removed the old gasket and had to clean up the groove on the cover. This shows some of the residue left in the grove. I had to use a screwdriver and a metal pick to clean it out.
It looks much better now. I also cleaned up the top of the cylinder head where the gasket sits. Compare this picture of the valves with the one above and you can see that it cleaned up pretty nicely.
The next step, I was trying to put the new gasket into the grove. It didn't want to stay in place. I tried using some of the oil pooled in the corners of the cover to coat on the gasket but it wasn't enough. I also tried setting the gasket on the cylinder head but it kept wanting to curl up. I walked over to the boat shop on the other side of the marina to see if they had any type of sealant that could help keep the gasket in place. Thankfully, they did have this stuff that had an applicator brush on the lid. I brushed the liquid on the groove and waited for a minute or so. It dried with a stickiness that helped keep the gasket in place, which is exactly what I was hoping for.
I attached the valve cover back on the engine. I tightened the bolts and looks like it got a good seal. I started up the engine and looked it over for several minutes and everything looked to be working nicely. No sign of additional oil leaking. The water pump I cleaned up during the last visit turned out to be functioning well too. No water leaked from the pump during the engine testing so I'm happy with that too.
I also setup the jib and main sails up on the boat. I then tied things down and put the cover on the main sail. Everything seems to be ready to go out sailing. If any other setup is needed, it might be to setup the reefing lines. The next time I'm at the boat, I may just let loose the dock lines and head out onto the lake.


Daniel:
ReplyDeleteRecommend setting up the reefing lines before you head out.
Good idea. Never know if conditions will change, even on a nice day. I'm also going to need at least a new arrow for the wind direction on the mast head.
DeleteI envy your engine access. On the center cockpit models you have to pull the engine to pull the valve cover and access the rocker assembly. Unless you have a hatch in the bottom of the cockpit well which some owners have done.
ReplyDeleteI noticed the difference in access space when looking at the NS27 Daphne, which is center cockpit so I am happy with the space I have. I don't have cockpit access. I don't know the distance between the valve cover top to the cockpit bottom but I can stick my head in there carefully. I have wires crossing the front of the engine access that makes it a little difficult.
DeleteHard to tell from the photos, but what type of reefing setup are you going with?
ReplyDeleteI'd have to take a closer look at it myself. Looks like there are two reefing points with tie down strings through the sail. There is also rings on the leech side for reefing lines to attach. There is one additional outhaul mounted on the boom I think is used for the additional rings. I'll take a closer look the next time I'm at the boat. Maybe next weekend. If not, I won't be able to visit the boat again until early Sep because of work requirements.
DeleteJust checking in on your progress. Have to say that is one pretty engine! And such good access, too. Also, I second the reefing lines comment.
ReplyDeleteThanks. I'm surprised the engine looks so good for being 30+yrs old. The hour meter only says 714 and I don't think it's been fully rebuilt so it must have seen light use over the years.
Delete