Showing posts with label rigging. Show all posts

Sunday, August 11, 2019

Mast Decisions

Over the last couple weeks, I have been looking at how I can at least get the mast up. Other owners are able to raise their own masts. I happen to have a video on the boat made by another owner. Have watched it several times over the past week alone.

Got some clevis pins and test fit one of the spreaders.


Before deciding to try self-raising the mast, I was talking to the manager at the marina about it and for them to do it, the boat would have to be in the water and they use a forklift to lift the mast.

ok.

I figured, I now have the last seacock installed on the boat. Maybe if I can get it to FLOAT long enough, I can get the mast up. I pulled out the shaft and coupler hardware to install that to the engine... But, it didn't line up. Great, now I need someone to help align it since it's pretty far off. Well, I'll figure that out later. This is where I seriously considered raising the mast myself.


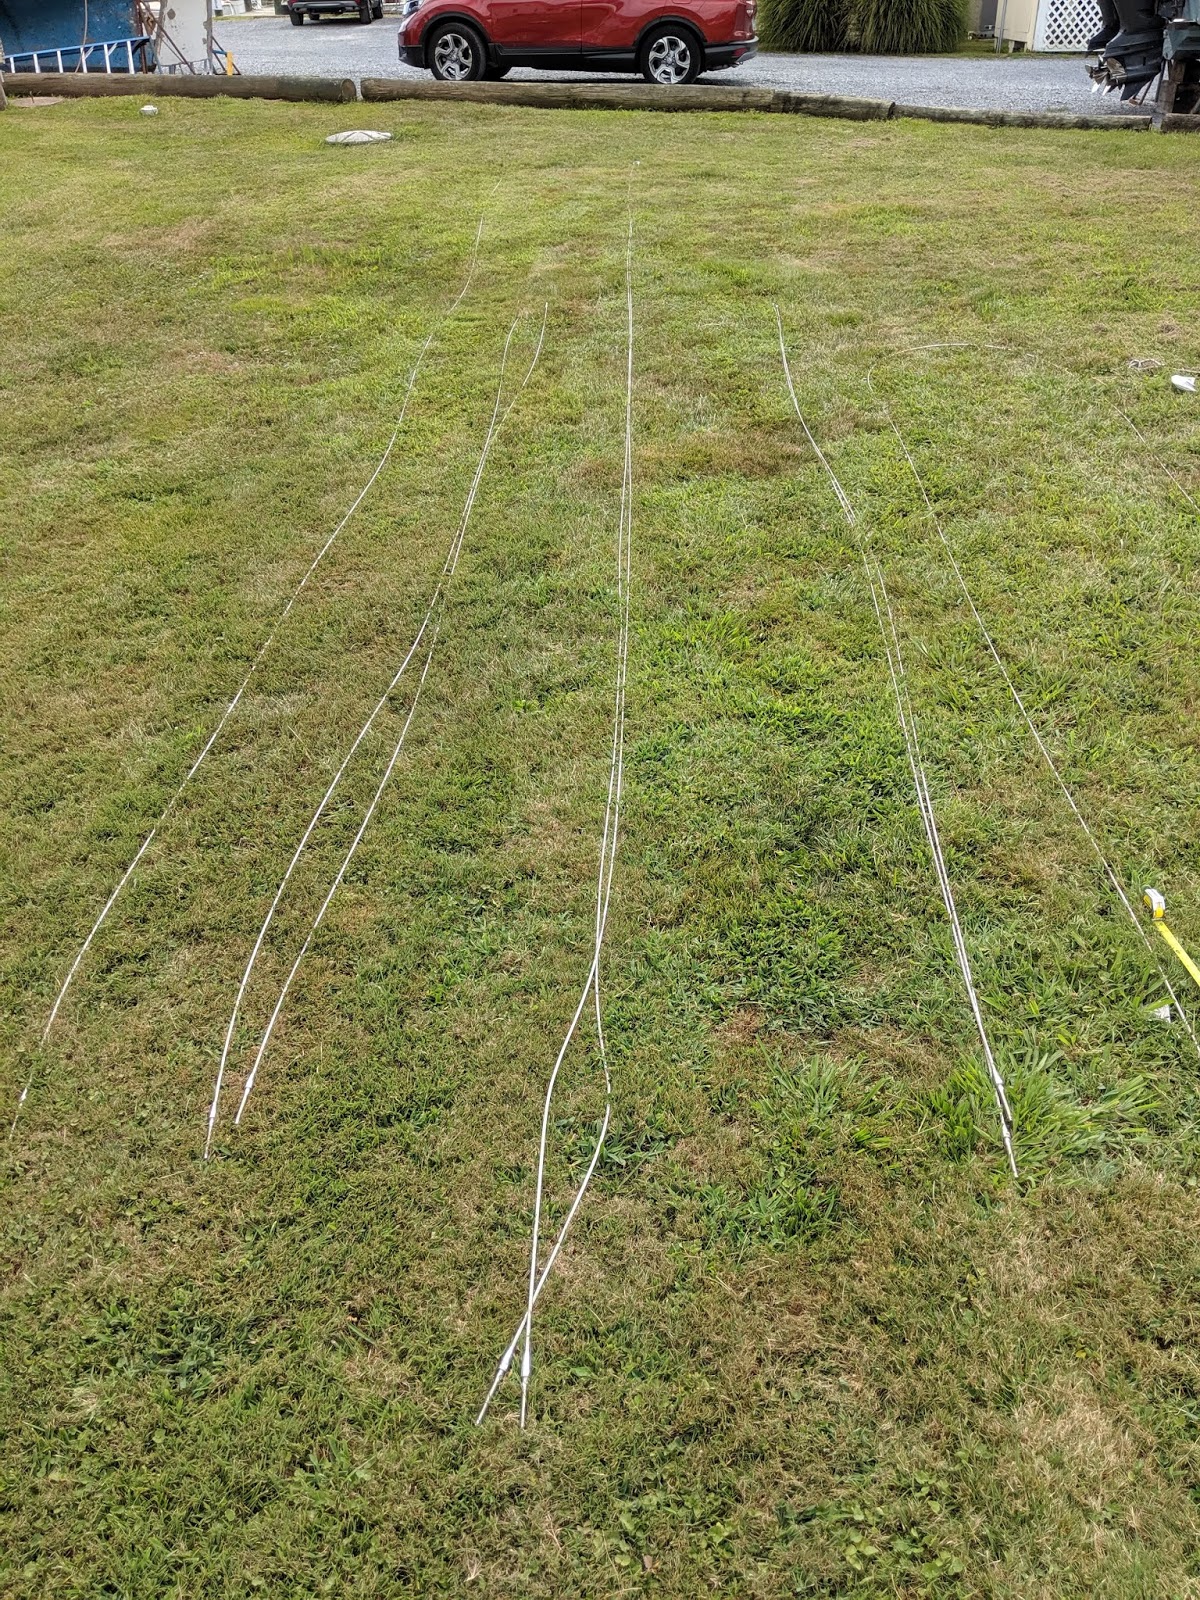
Back to the mast. Yesterday, I looked around at it. Pulled out the standing rigging to lay it all out. The main part of being able to raise the mast seems to be a modified shroud. I just need to shorten the long shroud to the level of the mast step tabernackle and add a shortened piece below it to the chainplate. Sounds easy enough but will take some planning. I looked at the video a few more times in the boat.

Aside from needing to modify the shroud, I will need to come up with a holder for the mast at the bow rail. Others have used bow rollers, but the one's I've seen are pretty expensive. I'm looking into plywood, at least for now, that can hold the mast at the bow, and prevent it from wanting to roll over.

Took some measurements around the mast bottom. I also took a turnbuckle and a triangle plate I luckily found locally and set it out trying to visualize the mod.


turnbuckle to the chainplate, triangle plate to the pivot point

Here, I'm just trying to get an idea of how I would do this. And, where I would cut. I also looked at the turnbuckle trying to decide how much slack I should put in it. With it opened up, it was about 11 inches, but with all the threads in the turnbuckle body, it made it 3 inches shorter. Maybe I could have it 1 inch shorter and that could give me some room to tune the rig when it's up. I tried measureing the chainplate to the mast step height difference, but may need to do it a couple more times, just to make sure I cut the shroud at the right place.



picked a point on the turnbuckle, came to about 11 inches

pushed the wires in, to get this measurement and something flew out and stung me. Not too bad, but it hurt for several minutes. I was getting an idea of size for bow support.


Ordered some hardware for the modification. So, until I get that and look over things some more over the next couple (few? several?) weeks, I won't be doing too much with the mast. Hopefully this idea goes well.

Wednesday, December 7, 2016

Every Little Bit Helps

Things have been busy. Since reworking a little bit of the wiring for the house bank, I'm looking beyond it to the wiring the feeds into the rest of the boat systems. Some wires cross in front of the engine space, so I want to get those ones moved out of the way. I also looked into where the main wires go from the battery connections and found a single point of connection for the battery banks and what looks like a few other things. Looking to change that as well where I could label what each of the wires are for and use a bit larger bus bar to organize everything.


Positive connection

Negative connection
I'm also working on splicing lines that will be used as new halyards. It's a learning process. In this first picture below, I made the splice at the top while following a video and while it was a pain for part of it, I was told it wasn't the "right kind" of splice. Taking the recommendation to do a "Class II Double Braid" splice, following along to a video, I then did the bottom splice. Still in need of a lock stitch and wrapping the exposed cover. Both, I think, will still hold well. At least I'm getting some practice if/when I ever need to redo this.


The next picture below, is some Amsteel Blue that I made a Brummel eye splice on one end. Just the process of making that one locks it so it doesn't come undone. I'm expecting it to be used in the outhaul setup and will see how that works when the mast/boom goes back together.


The shop working on my mast also modified my mast step. Before the wires were coming up to the deck and all connections were made there. The shop owner said connections should be made below, out of weather exposure. So, they attached a short tube where the wires would pass through, down the compression post and exit below the cabin floor.


In an attempt to clean things up, this past weekend was spent cleaning up around the boat and putting things away that I didn't need at the moment. I also retightened the nuts for the chainplate bolts, reinstalled the insulation material I had up and started screwing in the boards along the side of the hull. I know the insulation will work well in the summer, but wondering if it'll help heat up the inside of the boat as well in winter.


While many people have their boats hauled out and any projects slow down, I'll still work through and do what I can along the way. Still a lot of work ahead of me and if I expect to launch next season, I need to keep at it. Still working on a lot of things so hopefully I can make some progress and be able to post here soon.

Sunday, June 23, 2013

Additional Setup

I went to the boat again today to check things out. I went on the boat to take a look. I was able to get on the boat from stepping over on the bowsprit. Grabbing the forestay, first thing I noticed was how loose it felt. It didn't feel loose from the furler track over it, just felt like there was a lot of slack in it. I'm new to this so I'm not sure. The shrouds were all tight. There are two full backstays. One felt more loose than the other. I could have moved the boat to the slip, but didn't want to just to make sure the yard didn't have to do anything else.

First thing I did was to setup the radar mast. I had most of the hardware needed and only had to get three nuts from the local chandlery. I also tested out the radar and seemed to work ok.


There were a bunch of lines attached to the mast. I unwound them to sort out what they all were. The lines going up the mast were the main halyard, jib halyard, and two lines that looked like one was for hank-on sails and another possibly for a topping lift but seemed just short of reaching the end of the boom. Two lines were on the wrong side of the spreaders so I had to throw a line just above the spreaders to pull them back over. It took many tries to throw the line and I'm sure anyone watching could have had a good laugh.

The line I used was from the roller furling.


The lines were cleaned up and organized better than before.


One of the lines I had to pull over looked to belong to the jib halyard. There was no shackle on the end and I tied it to the bow.


I then took the main halyard and used it as a topping lift for the boom. This helped me lift it to attach the gooseneck and boom vang to the mast.


The boom is now attached to the mast, ready for the main sail.


When I showed up at the boat, I connected the batteries for listening to some music. I also tested the motor too. Oddly, the motor seems to shake more than it did before, even when increasing the speed. I left one of the batteries connected with the bilge pump set on auto. I noticed the door to the head is easier to open and close. It is a bit odd (in a good way) to walk around the boat and feel the motion of being on the water. I guess I'm still a little used to being on the trailer but I'll get used to the water sure enough. ;-)

The last view before leaving for the day.


I'm planning to call tomorrow to see what else they're planning on doing. Personally, I think the standing rigging could be tightened. If they can do that during the day, then, I'll be able to move the boat to its slip.

Friday, June 21, 2013

She Floats!

I went to the marina right after work to check on how things were going with the boat. I showed up and saw the boat wasn't on the stands where I last saw it. I went over towards the travel lift area and saw this.


I am very happy seeing the boat floating. It was nice to see the mast in the air with the standing rigging that I replaced. It was also good to see where she was sitting at the water line.


I think the yard is still doing some final touches so I didn't want to move it yet. Since they don't work on the weekends, I'll have to check on Monday. Once I can move it from the yard area, I'll stop by to the fuel dock then to the slip.
 
They did a pretty good job on some gelcoat repairs. After a year of ownership, I will soon be able to get out on the water to test things out and enjoy some nice weekends.

Friday, March 29, 2013

New Gear: Mast Mate

Mast work is one thing I've been looking at with a cautious eye since I started shopping around for a boat.

I used to have an Amateur Radio tower with a height of 77' in my backyard at my last house I had. I'm used to climbing the narrow tower at that height. Of course, being firmly set in the ground with 60, 60lb bags of concrete and guy wires attached to earth anchors, it certainly wasn't moving. It had a nice view from the top too.

 
That concrete base is 3' x 3' for size comparison

Now, the idea of getting to the top of a mast I wasn't sure about. I'm expecting there would be a lot more movement at the top of a boats mast than the top of the radio tower. While reading various things around the net, it seemed the main methods used involved another person hoisting someone up. Since I am likely to be doing a lot of stuff around my boat without much, if any, help, I decided to find something for the solo/shorthanded sailor, a Mast Mate.

I've seen it advertised and seemed to have good reviews on some forums. A recent post of SV Sundowner getting new standing rigging showed it in use and I thought that it looked like it would work out well. I went ahead and ordered one that would accommodate my mast. After ordering online, I received a phone call shortly afterwards to finalize the order and it just arrived today. I still have the climbing belt left over from the tower that I can use with the Mast Mate.

Here are a few pictures I just took to show the package I received.


I attached one of the shackles temporarily to show how it is done. Once I order the appropriate size slides, I will attached them all.

Saturday, November 3, 2012

Almost Travel Ready

Today I was switching out the tires on the trailer. The owner/manager of the storage lot stopped by to take a look at what I was doing. He looked at the trailer fender all rolled up from the previous tire that had the tread peel off and ruined it. He happened to have an angle grinder and cut off the part of the fender that was rolled onto itself. You can see what the ruined part looked like in this post. As of today, there's still a couple tires I need to switch out that I can do later. The boat/trailer isn't moving just yet.
 

Part of the time I was working at the boat, I was putting the standing rigging that I replaced on the mast. Once everything was back on the mast, I went to the store and got some plastic wrapping. I wrapped up the rigging and lines to the mast then tied the mast higher on the trailer like it was when I bought the boat.


I also cleaned up the last piece of handrail from the top side. I bought some teak cleaner and brightener. I thought it might get the handrail to look better than the other pieces I did so far. It's hard to tell if it was working when the wood was still wet. I used the cleaner then brightener and did fresh water rinse after each part. I thought it was looking good but still hard to tell.


These next pictures show how the handrail looked once it was drying off. Now, it does look a lot better than before. I think tomorrow might be the day I start putting varnish on this piece. I'm thinking I'll be able to notice the difference in the wood once the varnish is applied. So far, it looks pretty good. Overall, everything seems to be working out pretty good. The boat/trailer is closer to getting ready to travel. I've had a few people at work express an interest in going out on the boat once it's in the water.