If you don't have anything to pull your prop off, consider going to Harbor Frieght. I had not thought of going there but after a suggestion, I went and found this 8 inch
jaw puller. It worked great to get the prop off after only a few turns. For $18, it was worth it. The rudder didn't leave me much space to work with but there was enough to do what I needed to.
 |
| the metal bar on the prop is the key |
The shaft doesn't look too bad to me. The cutless bearing looks to be in need of replacement so that will be looked at closer during my process.
 |
| Cutless bearing is squeezing out a bit |
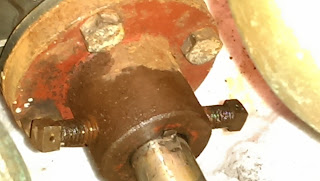
Worked on getting the shaft out, but that hasn't happened yet. Even though it doesn't show in the pictures below, I did take the two square bolts off. I had sprayed it with PB Blaster thinking that could help, but nothing so far. I may try getting the bolts off to remove the coupling altogether. Tried one nut/bolt but they didn't want to budge. I may spray those down with PB Blaster as well.
 |
| Work light is a big improvement over a head lamp or cell phone light |
Getting the old water lift muffler out wasn't easy, but then, what is? I ended up using a hacksaw to cut the house on either side of the muffler to get it out. There didn't seem to be much in the can. It had a vinegar smell to it. Maybe it was something from the last time I ran the pink anti-freeze through it last year.
 |
| Pulled on this to get better angle to cut the hose. | |
 |
| Not much space in the lazarette, but I can still fit. |
 |
| VERY old metal can style. Going to look for its replacement. |
The muffler sat on a little "shelf" next to one of the cockpit drain thru-hulls.
This is what was used as a riser for the exhaust setup. I've seen suggestions by/for others what say an anti-siphon valve would be very helpful. After cutting into the hose, I was told that it can be very expensive to replace. While the hose doesn't seem to bad, it's also an unknown number of years that it's been there. So, more added to the list to replace for this refit.
 |
| the hose/valve on the right is part of the fresh water system |
 |
| diamond plate? Just thought it was odd since the front end of the tank has a smooth top |
 |
| Taking a short break, laying back in the lazarette with the feet in the quarterberth |
 |
| hmmm something doesn't look right here. Part of fuel tank vent hose. | |
| |
| |
|
 |
| Fuel tank vent |
 |
| Galley thru-hull removed. working towards its replacement |
Quite a bit of work going on and a lot more left to go. The last couple days, I've been thinking of putting a frame around the cockpit to cover it up. That would keep the weather out and I can remove the cockpit drain thru-hulls and hoses to open up the space for better access and not worry (ok, maybe a little) about getting water into the boat during the refit. Remember, there's still no batteries, which means no automatic bilge pump. Sometimes this boat is full of little surprises and not all of them good. I didn't expect to see the fuel vent hose to be two different sizes like it was. I may be able to get away with just adding a fitting and clamps in between them. Also, from what I've seen regarding the risers for exhaust setups, two elbows probably isn't the best solution.


Nice, you're turning over the rocks....lots of things to fix and repair!
ReplyDeleteAll the little things really add up. Trying to make sure I don't miss anything during this refit so this boat will last another 30+ years.
DeleteNice to see you making progress. You are correct, it is the little things! I am finding that out now. In the end I will have a boat that will last me the rest of my life time! Keep us posted and Keep the pictures coming!
ReplyDelete