Yesterday, I logged onto the FCC ULS website to see if there was an update to the application I submitted on the 10th. I was pleased to see that I now have a callsign and MMSI issued for Rhapsody. It only took 4 days. This is good news in case someone is coming up on a long voyage and needs it quickly.
Since I don't need AIS or DSC functions right now, I have plenty of time to research equipment and add it during the refit period or as funds come available.
Saturday, August 17, 2013

Saturday, August 10, 2013
How do you get an MMSI from the FCC?
This question is asked by many by those who want to get a DCS capable radio or to be able to transmit AIS position reporting. Some day, I'd like to add both of these capabilities and need to get an MMSI ahead of time.
From my limited research, you file for your MMSI from the FCC if your vessel will be traveling to international waters and foreign countries, even if it's to Canada or Bahamas and beyond. If your vessel is going to be in US waters only, you can apply through BoatUS.
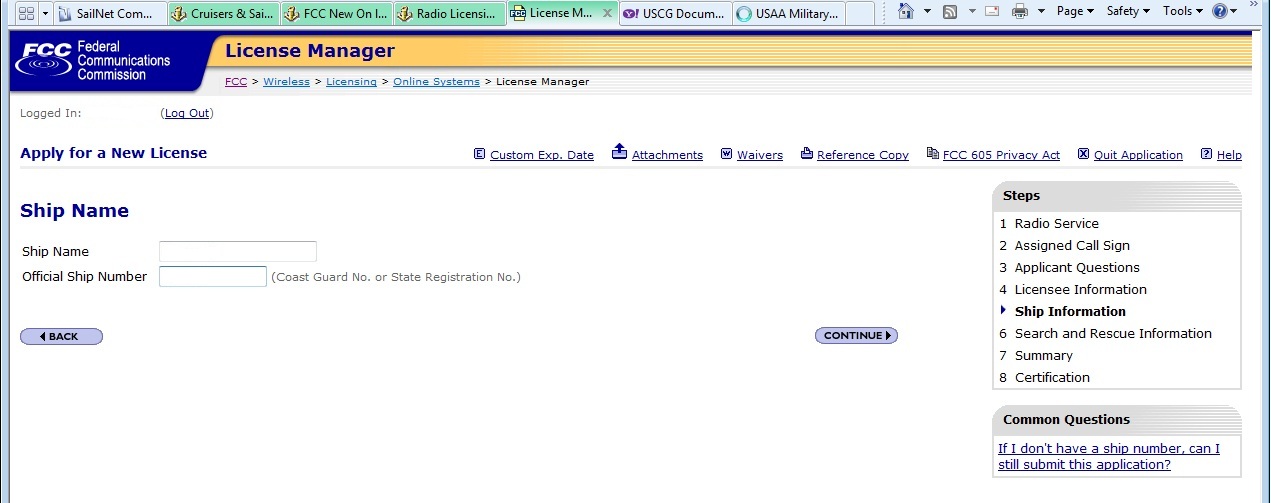
I was looking at the process of how to do this and found a forum post where someone talked about it in a post from 2007. To get started, you need to get on the FCC Universal License System (ULS) website. If you don't already have an FCC Registration Number (FRN), you need to register for one. Being an amateur radio operator, I already had one so I just had to log in and submit a new application in order to get an MMSI.
There's a lot of pictures here, but follow this process with the information needed for yourself and your vessel and you should be good. I'm no expert here but this will give you an idea of what to expect during the process. I just did this process and it didn't take long to do at all. The longest part of this was making the screen shots to share with everyone else. Good luck!
NOTE: The cost for this application is $160.


From my limited research, you file for your MMSI from the FCC if your vessel will be traveling to international waters and foreign countries, even if it's to Canada or Bahamas and beyond. If your vessel is going to be in US waters only, you can apply through BoatUS.
I was looking at the process of how to do this and found a forum post where someone talked about it in a post from 2007. To get started, you need to get on the FCC Universal License System (ULS) website. If you don't already have an FCC Registration Number (FRN), you need to register for one. Being an amateur radio operator, I already had one so I just had to log in and submit a new application in order to get an MMSI.
There's a lot of pictures here, but follow this process with the information needed for yourself and your vessel and you should be good. I'm no expert here but this will give you an idea of what to expect during the process. I just did this process and it didn't take long to do at all. The longest part of this was making the screen shots to share with everyone else. Good luck!
NOTE: The cost for this application is $160.




Sunday, July 14, 2013
Sails And Engine Are Ready
At least I hope all is ready. Everything seems to be working so far.
This weekend was busy. I replaced the valve cover gasket on the engine and rigged up the sails.
The area at the base of the valve cover showed some oil that had leaked. At first, I thought the oil came from a failed head gasket but after a closer look, I saw it was actually the valve cover gasket.


Here is my first look after removal of the valve cover. I saw there was some buildup of dirt, possibly of where the oil had leaked.


I removed the old gasket and had to clean up the groove on the cover. This shows some of the residue left in the grove. I had to use a screwdriver and a metal pick to clean it out.


It looks much better now. I also cleaned up the top of the cylinder head where the gasket sits. Compare this picture of the valves with the one above and you can see that it cleaned up pretty nicely.


The next step, I was trying to put the new gasket into the grove. It didn't want to stay in place. I tried using some of the oil pooled in the corners of the cover to coat on the gasket but it wasn't enough. I also tried setting the gasket on the cylinder head but it kept wanting to curl up. I walked over to the boat shop on the other side of the marina to see if they had any type of sealant that could help keep the gasket in place. Thankfully, they did have this stuff that had an applicator brush on the lid. I brushed the liquid on the groove and waited for a minute or so. It dried with a stickiness that helped keep the gasket in place, which is exactly what I was hoping for.

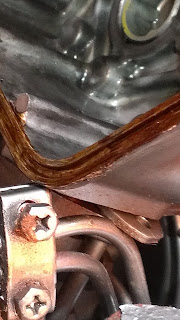

I attached the valve cover back on the engine. I tightened the bolts and looks like it got a good seal. I started up the engine and looked it over for several minutes and everything looked to be working nicely. No sign of additional oil leaking. The water pump I cleaned up during the last visit turned out to be functioning well too. No water leaked from the pump during the engine testing so I'm happy with that too.

I also setup the jib and main sails up on the boat. I then tied things down and put the cover on the main sail. Everything seems to be ready to go out sailing. If any other setup is needed, it might be to setup the reefing lines. The next time I'm at the boat, I may just let loose the dock lines and head out onto the lake.


This weekend was busy. I replaced the valve cover gasket on the engine and rigged up the sails.
The area at the base of the valve cover showed some oil that had leaked. At first, I thought the oil came from a failed head gasket but after a closer look, I saw it was actually the valve cover gasket.


Here is my first look after removal of the valve cover. I saw there was some buildup of dirt, possibly of where the oil had leaked.


I removed the old gasket and had to clean up the groove on the cover. This shows some of the residue left in the grove. I had to use a screwdriver and a metal pick to clean it out.


It looks much better now. I also cleaned up the top of the cylinder head where the gasket sits. Compare this picture of the valves with the one above and you can see that it cleaned up pretty nicely.


The next step, I was trying to put the new gasket into the grove. It didn't want to stay in place. I tried using some of the oil pooled in the corners of the cover to coat on the gasket but it wasn't enough. I also tried setting the gasket on the cylinder head but it kept wanting to curl up. I walked over to the boat shop on the other side of the marina to see if they had any type of sealant that could help keep the gasket in place. Thankfully, they did have this stuff that had an applicator brush on the lid. I brushed the liquid on the groove and waited for a minute or so. It dried with a stickiness that helped keep the gasket in place, which is exactly what I was hoping for.


I attached the valve cover back on the engine. I tightened the bolts and looks like it got a good seal. I started up the engine and looked it over for several minutes and everything looked to be working nicely. No sign of additional oil leaking. The water pump I cleaned up during the last visit turned out to be functioning well too. No water leaked from the pump during the engine testing so I'm happy with that too.

I also setup the jib and main sails up on the boat. I then tied things down and put the cover on the main sail. Everything seems to be ready to go out sailing. If any other setup is needed, it might be to setup the reefing lines. The next time I'm at the boat, I may just let loose the dock lines and head out onto the lake.


Sunday, June 30, 2013
Weekend Work
Earlier this past week, I ordered a 3 gal. day tank, some hose and a couple connectors.
The tank is pretty strong and sturdy. Pushing on the sides, it wouldn't give at all. It's made by Attwood.

One of the first things I did was drill a hold in the center and installed the brass fitting to be used as the fuel return.
After work this past Friday, I loaded up the truck and headed to the marina. The boat was moved from the yard dock to the next dock over. I grabbed supplies from the truck and loaded them onto the boat. I met a couple on the next boat over and they helped me out with a couple things like raising the boom for the topping lift to keep it out of the way. Having the raised boom allowed me to stand in the cockpit without my head hitting it. Along with the immediate neighbors, there were a few more people coming by to take a look at the boat asking questions about what kind it is and to take a look at it. I got plenty of compliments.
I spent Friday and Saturday night in the forward berth.

The next morning was nice. The temperature was cool and I could hear geese squawking nearby. I had to take a picture of them. I later walked around the marina and saw them cleaning themselves on the shoreline on the other side of the marina.


One thing around here that seems to be plentiful is the spiders. They're quick in setting up their webs.


I emptied the lazarette to test fit the tank as I was considering to have it stored there.

I first worked on getting the return line setup. The hose on the return line mounted on the injectors didn't have a usual hose clamp but instead had a binding clamp that took some time to undo. I couldn't undo it while mounted from the engine so I took the return line off the injectors altogether.


It took some time but I finally got it off. I wasn't reusing the hose anyway so I cut it away from the line. Good thing. One I got it off and detached the other end from the tank, I pulled it out from around the engine and saw some duct tape on it. No telling how long that was there.

I then worked on the feed line. The line and handle on the tank is under the engine. Everything was accessible from the front, which made it easy to work with.


At the moment, I have everything tied into the tank from the front. The tank actually fits under the companion way stairs when in place. Once the hoses were setup, I went to my truck with the little tank and filled it up half way from a 5gal can then brought it back to the boat and hooked it all up.

With the hoses connected, I opened up the line to one of the two Racor filters and squeezed the priming bulb to it to pull fuel through the line. The first start of the engine was a success. The engine ran nicely for about a half hour. After that, it would run for a short time then stall out. I was able to move the boat back to its slip. During the short trip, the engine continued to stall several times but I eventually arrived and quickly secured the dock lines in place. I later unscrewed the bleed nut from the fuel filter and injector pump. Air hissed out of the fuel pump more so than the injector pump but I feel that it was bled nicely. I didn't restart the engine after this bleed as I was also working on another project.
The raw water pump on the engine had a leak of its own. When I installed a new impeller, it would leak when the engine was running. There was some buildup of corrosion on the housing, likely form spending much of it's life in salt water, that I wanted to clean up. I saw a post on a Cape Dory owners forum where someone used vinegar to clean corrosion off bronze pieces and they came out looking like new. So, I pulled the pump off and took the plate off along with the impeller.


I put the pump housing and the cover plate in a pot with vinegar. The parts started bubbling as the acid from the vinegar was eating away the corrosion from the parts.

After leaving them soak for about a couple hours, I pulled them out and wiped them off and used a wire brush to clean up some more. I think they turned out very well. Compare the photo below with the screw on the bottom with the one above with the corrosion around it. When I took the picture, I didn't use a wire brush on that part and it still cleaned up nicely.


When I was installing the impeller again, I remember the new one came with a small packet with lubricant. I no longer had this, or any other packet, but I remember it was glycerin. I read somewhere that using dish soap was good to use as it's mainly used to get it started when pumping the water, then the water itself is what keeps the impeller moving freely. I didn't have dish soap either. I thought about it for a while. I didn't really want to go find a store with soap and lose my parking space as it's very limited. Then, I realized I might have some. I went to my truck and got a tube of Aloe gel that I had in case of sunburn. Guess what one of the main ingredients is... right after water, it's glycerin. So I dabbed some of it into the impeller chamber and smeared some of it on the face of the place while installing a new rubber gasket and put it all back together. In case anyone is wondering, the cover plate is a Speedseal that was installed by a previous owner. Much easier to remove than what I've seen with other boats that have many screws to undo in order to change the impeller.


I think everything looks SO much better now that it's cleaned up. The seal looks like it's seated much better than before too. I then reinstalled the water pump back on the bracket and onto the engine. I didn't start it to test yet as I wanted to check a couple other things on the engine first. I tried to take off a cover that housed one of the engine zincs but it wouldn't budge and the other was even harder to get to. I have a bit of an oil lead that I believe is from the valve cover gasket. I was going to take the cover off to clean up around the area but decided to leave that for the next time I visit the boat.
The tank is pretty strong and sturdy. Pushing on the sides, it wouldn't give at all. It's made by Attwood.

One of the first things I did was drill a hold in the center and installed the brass fitting to be used as the fuel return.
After work this past Friday, I loaded up the truck and headed to the marina. The boat was moved from the yard dock to the next dock over. I grabbed supplies from the truck and loaded them onto the boat. I met a couple on the next boat over and they helped me out with a couple things like raising the boom for the topping lift to keep it out of the way. Having the raised boom allowed me to stand in the cockpit without my head hitting it. Along with the immediate neighbors, there were a few more people coming by to take a look at the boat asking questions about what kind it is and to take a look at it. I got plenty of compliments.
I spent Friday and Saturday night in the forward berth.

The next morning was nice. The temperature was cool and I could hear geese squawking nearby. I had to take a picture of them. I later walked around the marina and saw them cleaning themselves on the shoreline on the other side of the marina.


One thing around here that seems to be plentiful is the spiders. They're quick in setting up their webs.


I emptied the lazarette to test fit the tank as I was considering to have it stored there.
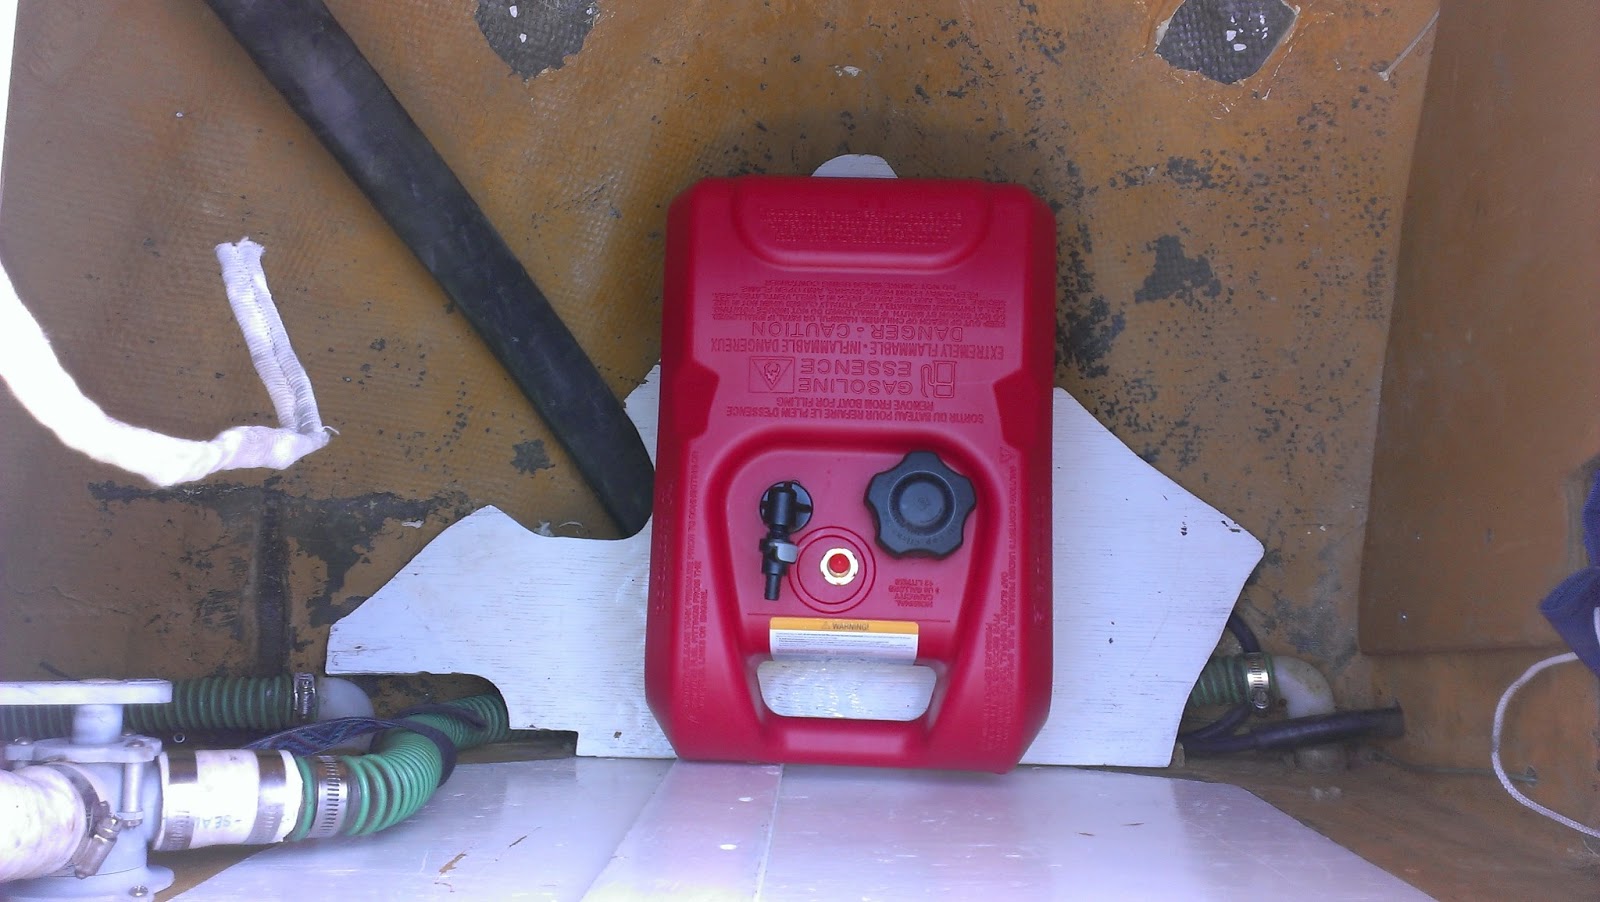
I first worked on getting the return line setup. The hose on the return line mounted on the injectors didn't have a usual hose clamp but instead had a binding clamp that took some time to undo. I couldn't undo it while mounted from the engine so I took the return line off the injectors altogether.


It took some time but I finally got it off. I wasn't reusing the hose anyway so I cut it away from the line. Good thing. One I got it off and detached the other end from the tank, I pulled it out from around the engine and saw some duct tape on it. No telling how long that was there.

I then worked on the feed line. The line and handle on the tank is under the engine. Everything was accessible from the front, which made it easy to work with.


At the moment, I have everything tied into the tank from the front. The tank actually fits under the companion way stairs when in place. Once the hoses were setup, I went to my truck with the little tank and filled it up half way from a 5gal can then brought it back to the boat and hooked it all up.

With the hoses connected, I opened up the line to one of the two Racor filters and squeezed the priming bulb to it to pull fuel through the line. The first start of the engine was a success. The engine ran nicely for about a half hour. After that, it would run for a short time then stall out. I was able to move the boat back to its slip. During the short trip, the engine continued to stall several times but I eventually arrived and quickly secured the dock lines in place. I later unscrewed the bleed nut from the fuel filter and injector pump. Air hissed out of the fuel pump more so than the injector pump but I feel that it was bled nicely. I didn't restart the engine after this bleed as I was also working on another project.
The raw water pump on the engine had a leak of its own. When I installed a new impeller, it would leak when the engine was running. There was some buildup of corrosion on the housing, likely form spending much of it's life in salt water, that I wanted to clean up. I saw a post on a Cape Dory owners forum where someone used vinegar to clean corrosion off bronze pieces and they came out looking like new. So, I pulled the pump off and took the plate off along with the impeller.


I put the pump housing and the cover plate in a pot with vinegar. The parts started bubbling as the acid from the vinegar was eating away the corrosion from the parts.

After leaving them soak for about a couple hours, I pulled them out and wiped them off and used a wire brush to clean up some more. I think they turned out very well. Compare the photo below with the screw on the bottom with the one above with the corrosion around it. When I took the picture, I didn't use a wire brush on that part and it still cleaned up nicely.


When I was installing the impeller again, I remember the new one came with a small packet with lubricant. I no longer had this, or any other packet, but I remember it was glycerin. I read somewhere that using dish soap was good to use as it's mainly used to get it started when pumping the water, then the water itself is what keeps the impeller moving freely. I didn't have dish soap either. I thought about it for a while. I didn't really want to go find a store with soap and lose my parking space as it's very limited. Then, I realized I might have some. I went to my truck and got a tube of Aloe gel that I had in case of sunburn. Guess what one of the main ingredients is... right after water, it's glycerin. So I dabbed some of it into the impeller chamber and smeared some of it on the face of the place while installing a new rubber gasket and put it all back together. In case anyone is wondering, the cover plate is a Speedseal that was installed by a previous owner. Much easier to remove than what I've seen with other boats that have many screws to undo in order to change the impeller.


I think everything looks SO much better now that it's cleaned up. The seal looks like it's seated much better than before too. I then reinstalled the water pump back on the bracket and onto the engine. I didn't start it to test yet as I wanted to check a couple other things on the engine first. I tried to take off a cover that housed one of the engine zincs but it wouldn't budge and the other was even harder to get to. I have a bit of an oil lead that I believe is from the valve cover gasket. I was going to take the cover off to clean up around the area but decided to leave that for the next time I visit the boat.
Subscribe to:
Posts (Atom)